Enterprise AI Installation and Deployment
Primarily involves deploying knowledge bases and AI large models. The deployment method is flexible, allowing for partial online and partial offline deployment (generally, knowledge bases are deployed offline, and large models are deployed online to ensure the privacy of enterprise data).
This tutorial requires you to have a basic understanding of the installation and use of Ragflow and be able to customize Agent workflows. There are many related resources online. If you don't want to learn, you can contact customer service for paid deployment and customization.
Deployment Process
- Install Ollama
- Install the specified large model
- Install Git
- Install Docker
- Install RagFlow knowledge base
- Configure RagFlow's default model service provider
- Set up the enterprise knowledge base server
- Configure the business OpenAI API
- Configure the assistant OpenAI API
- Configure Agent in RagFlow
- Configure the system's AI salesperson
- Enable the private message auto-reply switch
1. Install Ollama
Ollama is a tool for quickly installing and deploying large models. After installing Ollama, you can easily and quickly install various large models. Running large models consumes a lot of computing power and has high hardware requirements. The larger the model parameters, the more intelligent it is, and the higher the computing power configuration requirements. If you want better results, it is recommended to install the cloud image (you can pay according to the usage time).
There are two installation methods:
1. Local download and installation (completely free, suitable for local computers with relatively high configurations)
Go to the Ollama download page and download the client to install it.
After downloading and installing, you need to install the specified large model. Directly open your computer's command line (terminal).
For example, if we want to install the qwen3:14b large model, enter ollama pull qwen3:14b in the command line (terminal) and press Enter.
2. Cloud image installation (charged by time, suitable for enterprises that require high AI output quality)
We have customized an Ollama image on Xiangong Cloud, Ollama image address. Deploy directly according to this image.
If you need to deploy a model with a large number of parameters, it is recommended to increase the number of GPUs and additionally expand the system disk during deployment.
To learn how to obtain the external network access address of the Ollama service and how to install large models, please see Ollama image address, which contains detailed instructions.
2. Install Large Models
Three types of models need to be installed:
- Embedding model
- Chat model
- Img2txt model (similar to the chat model, the difference is that it supports vision)
WARNING
The current demonstrations are all small parameter models. You can install models with larger parameters as appropriate according to your computing resources to obtain better results.
Embedding model selection
Visit Embedding Model List, which contains all available embedding models. We choose bge-m3 as an example. Following the previous step, enter ollama pull bge-m3 in the command line (terminal) and press Enter.
Chat model selection
We generally choose qwen3, and its various versions are as follows address. Choose to install according to your machine configuration. We choose 8b as an example. Following the previous step, enter ollama pull qwen3:8b in the command line (terminal) and press Enter.
Img2txt model (image recognition model)
Visit Vision Model List, which contains all available embedding models. Here we choose gemma3, and its various versions are as follows address. Choose to install according to your machine configuration. We choose 4b as an example. Following the previous step, enter ollama run gemma3:4b in the command line (terminal) and press Enter.
3. Install Git
According to your system type, enter the corresponding installation instructions page and download and install according to the page prompts.
4. Install Docker
5. Install RagFlow Knowledge Base
Follow the official Installation Instructions and install according to the steps.
There are many Ragflow tutorials online. There are many related tutorials on bilibili. You can search and learn about the basic usage, such as bilibili
6. Configure RagFlow's Default Model Service Provider
Determine your Ollama service address
- If your Ollama is installed locally, and RagFlow accesses your local Ollama through Docker, then your Ollama service address is http://host.docker.internal:11434
- If your Ollama is installed as a cloud image, please see the instructions in Ollama image address to obtain the Ollama service address, such as https://kr4ifmcbkbm4gtol-11434.container.x-gpu.com
7. Enterprise Knowledge Base Server Settings
Your local knowledge base access address is http://127.0.0.1. Open this address in your browser, register and log in to your account.
Follow the video operation steps below to configure the API address and key to the specified location in the system.
8. Business OpenAI API Configuration
Configure the business OpenAI API account information for AI customer screening, AI copywriting generation, AI country recognition, etc.
- API Settings
- If your Ollama is installed locally, your Ollama service address is http://127.0.0.1:11434, the API should be filled in as http://127.0.0.1:11434/v1
- If your Ollama is installed as a cloud image, please see the instructions in Ollama image address to obtain the Ollama service address, such as https://kr4ifmcbkbm4gtol-11434.container.x-gpu.com, the API should be filled in as https://kr4ifmcbkbm4gtol-11434.container.x-gpu.com/v1
- Key Settings
Fill in ollama
- AI Large Model Settings
Set the corresponding name according to the chat large model you set. This tutorial uses qwen3:8b, fill in qwen3:8b.
9. Assistant OpenAI API Configuration
Mainly used to implement the AI assistant function. If you use the system assistant function in Enterprise AI, you need to set it here. Currently, ChatGPT has the best testing results.
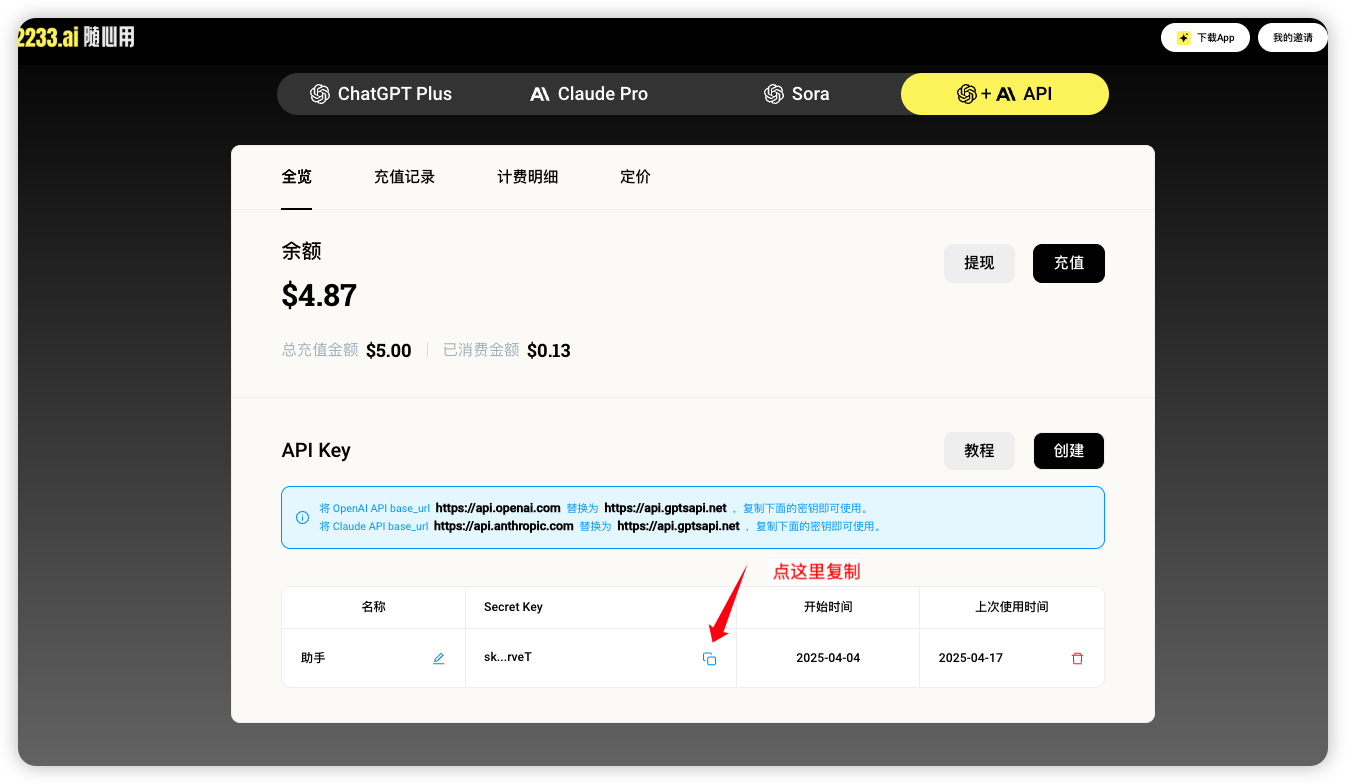
For ChatGPT service, it is recommended to register and recharge at 2233AI随心用网站, then open API Center to create a Key, and then you can copy your Key information.
- API Address
Generally fixed to https://api.gptsapi.net/v1
- Key Settings
- Ai Large Model Settings
Fixed setting gpt-4o-mini
10. RagFlow Configure Agent
Before configuring Agent, it is recommended to take a look at the RagFlow Agent example tutorial, Building a Smart Customer Service Case
The system provides three Agent templates
- Customer Classification Agent, Click to Download
- Private Message Reply Agent, Click to Download
- Automatic Comment Generation Agent, Click to Download
Create a blank Agent in RagFlow and import it. Note that the template Agent is just a process example. Some nodes, such as selecting the knowledge base, setting the AI model node, prompts, etc., need to be adjusted according to your own needs.
WARNING
No matter how you adjust it, you need to consider that if the Agent encounters a problem that cannot be solved, it should output N001 fixedly, and do not modify the input items of the starting node. This is the specification we have reached with the Agent.
11. Configure the System's AI Salesperson
After configuring the corresponding Agent in the previous step, in the AI Salesperson Settings Interface of our system, select different Agents according to different salesperson roles.

12. Enable the Private Message Auto-Reply Switch
Click the panel button in the upper right corner of the software, find the private message auto-reply area, and click to enable all.